Drylining for Newcomers: A Sequential Approach
If you're interested to enhance the inside of your residence or office, dry lining services is an excellent choice. This technique includes attaching drywall to walls and ceilings, resulting in a level surface that is prepared for decoration. Whether you are updating an existing space or constructing a new space, understanding the principles of drylining will help you make informed decisions about the project.
In this tutorial, we shall guide you through the dry lining process step by step. You will discover about the diverse types of materials utilized, the instruments necessary, and the techniques that expert dry lining contractors use to obtain a flawless outcome. With the help of a bit of preparation and the right method, you will successfully tackle dry lining projects on your own or better appreciate the labor performed by the experts.
Equipment and Supplies Needed
To get started with dry lining work, it's crucial to collect the right tools and supplies. First and foremost, you will need basic gear such as a cutting knife, a measuring tape, and a straightedge or T square for precise cuts. A wallboard saw can also come in handy for sawing through drywall in tighter spaces. Ensure you have a battery-operated drill or hand screwdriver for fastening the boards to the steel or timber studs.
In addition to tools, the supplies are important for a effective dry line project. High-quality plasterboard is a must, as it provides the main surface for your walls. Depending on the area you are working in, you might need water-resistant or fire-resistant boards. Additionally, be sure to include screws specially designed for plasterboard, joint tape for seams, and joint compound for finishing. These supplies will help achieve a flawless and professional look.
Safety gear should not be overlooked either. A respirator, protective eyewear, and hand protection will protect you from particles, debris, and cutting edges while you perform tasks. Investing in high-grade protective equipment ensures you can perform your drylining services securely and efficiently. Preparing with the right equipment and materials sets the foundation for a successful project.
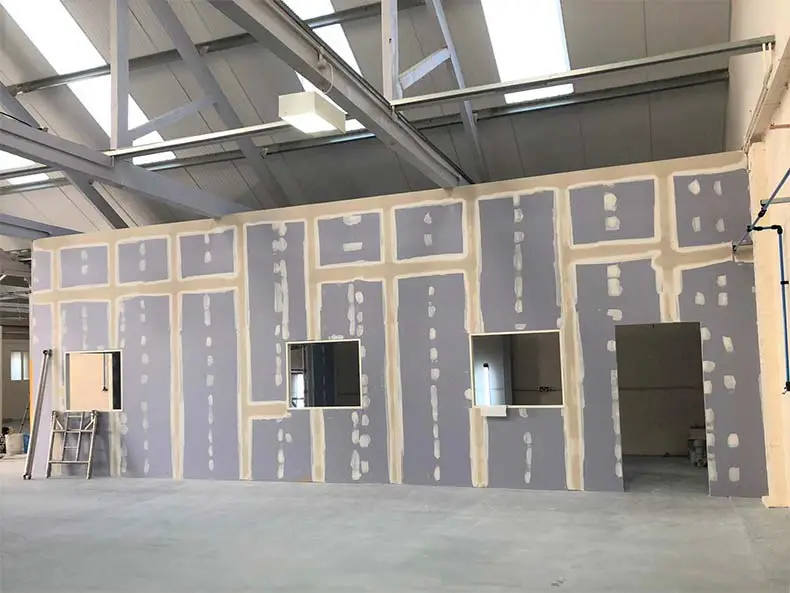
Step-by-Step Setup Process
The first step in the drylining fitting procedure is to get ready the area where the drylining boards will be fitted. This involves tidying the area and making sure that the areas to which the panels will be secured are clean and free of moisture. Additionally, any wiring or plumbing should be taken into consideration, and required adjustments made. Once the location is prepared, it's important to accurately measure the walls accurately to figure out the amount of partitioning supplies required.
Afterward, move forward with the installation of the aluminum or wooden studs, which will establish the skeleton for the drylining. Begin by noting the positions of the studs on the floor and ceiling, ensuring they are aligned vertically. Attach the studs in place using appropriate hardware, taking care to maintain a straight line for a professional look. Once the framework is finished, it is time to cut the panels to dimension, making sure to allow for any sockets or fixtures that may be existing.
Finally, attach the trimmed drylining to the framework using screws or glue, making sure they are stable and even. It is essential to maintain a small space at the floor to enable expansion and prevent water issues. After all the panels are in position, the seams should be taped and filled with joint compound. Once the filler is dry, smoothing down the area to achieve a even look before applying any paint or finishes. This completes the installation process, and your partitioning setup will be functional.
Common Pitfalls to Avoid
One common pitfall in drylining services is underestimating the value of thorough surface readiness. Before affixing any drylining boards, it is essential to ensure that the substrates are clear, free from moisture, and free from debris. Failing to do this can cause weak adhesion and can lead to the boards to bend or become unstuck over time. Investing the time to correctly prepare the surface can save significant work and cost in the end.
Another pitfall is neglecting to check for moisture problems. Insufficient attention to potential wetness can result in mildew issues and decay of the drylining material. It's wise to carry out moisture tests and, if needed, execute damp-proofing measures before moving forward with setup. Keeping a keen eye on moisture levels helps maintain the durability of the project and preserves a healthy indoor environment.
Finally, many beginners ignore the significance of accurate measuring and arrangement during installation. Incorrect measurements can cause gaps and off-kilter joints, compromising the overall aesthetics and performance of the drylining service. It is crucial to double-check all measurements and ensure that each board is correctly aligned before fastening it in place. This step seriously results in a more professional and attractive finished product.